
Website Support
How do I upload a photo to ID.me using an iPhone?
ID.me will not accept photos taken in the Live photo mode. To upload a photo from your iPhone, you’ll need to temporarily adjust your settings.
When Live photo mode is on, it will look like this:
- Read More
ID.me will not accept photos taken in the Live photo mode. To upload a photo from your iPhone, you’ll need to temporarily adjust your settings.
When Live photo mode is on, it will look like this:
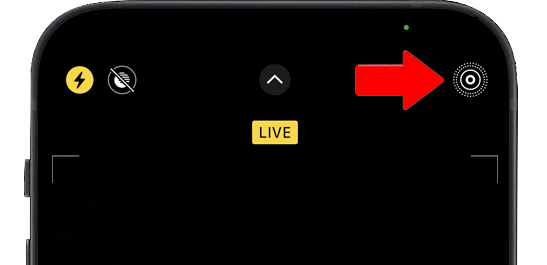
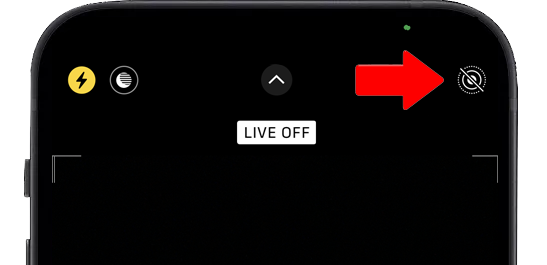
To temporarily turn off Live mode, tap the icon on the upper right corner of your camera. You should see an indicator that Live Mode is off. This will allow the picture to be taken in a JPEG format and can be uploaded into the ID.me platform. You can switch this setting to live mode once you've completed the process.
I need help with ID.me.
ID.me simplifies how individuals prove and share their identity online. Answers to many questions can be found in this FAQ.
- Read More
ID.me simplifies how individuals prove and share their identity online. Answers to many questions can be found in this FAQ.
For more information, users can go to the ID.me Help Center website for support in setting up or updating any information on their ID.me account at help.ID.me. Security Benefit and ID.me has developed three additional online resources for customers to ask questions and receive additional support:
- Step-by-step guides and troubleshooting information
- Submit an issue through an online form
- Online Chat available 24/7
I can’t view my account information on my Mac
In 2020, Apple implemented the blocking of cross-site cookies. This functionality can impact how you view your account information on SecurityBenefit.com with your Apple device, and you may need to adjust your Safari settings on your Mac operating system.
- Read More
In 2020, Apple implemented the blocking of cross-site cookies. This functionality can impact how you view your account information on SecurityBenefit.com with your Apple device, and you may need to adjust your Safari settings on your Mac operating system.
The following steps will help you through the process of getting "Prevent Cross-Site Tracking" disabled.
How to disable the "Prevent Cross-Site Tracking" feature
- In the Safari app on your Mac, choose Safari > Preferences then click Privacy.
- De-select “Prevent cross-site tracking.”
- Restart the Safari browser for the setting to take full effect.
- In the Safari app on your Mac, choose Safari > Preferences then click Privacy.
I can’t view my account information on iPhone or iPad
In 2020, Apple implemented the blocking of cross-site cookies. This functionality can impact how you view your account information on SecurityBenefit.com with your Apple device, and you may need to adjust your iPhone or iPad settings.
- Read More
In 2020, Apple implemented the blocking of cross-site cookies. This functionality can impact how you view your account information on SecurityBenefit.com with your Apple device, and you may need to adjust your iPhone or iPad settings.
The following steps will help you through the process of disabling "Prevent Cross-Site Tracking" in Safari on iOS - this process is the same for iPhone and iPad even though the screenshots might look slightly different.
How to disable the "Prevent Cross-Site Tracking" feature in Safari on iPhone/iPad
1. On your iPhone/iPad, open the "Settings" App
Return to the Home Screen by pressing the round button underneath the screen. You will see the grid of icons. Then, find the "Settings" icon and tap on it.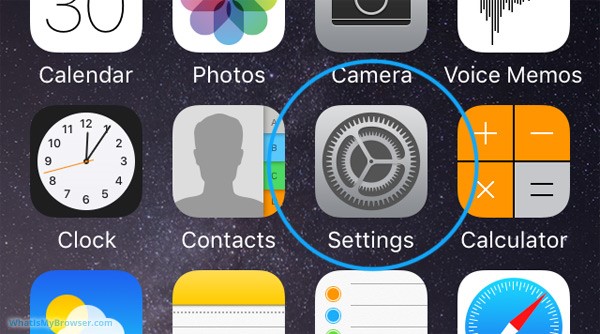
2. Scroll and tap on the "Safari" item
The Settings screen will be longer than the actual screen of your iPhone, so to reach the "Safari" section you need to scroll the screen down a bit by dragging on the screen with your finger.
When you see the Safari item, tap on it to see the options for Safari.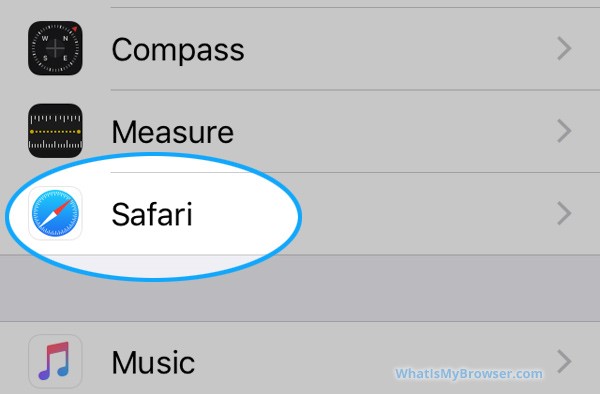
3, Scroll down to Privacy & Security
Move the slider next to "Prevent Cross-Site Tracking" to the left (and turned gray).
4. You have configured your cookies settings to disable "Prevent Cross-Site Tracking"
Restart the Safari browser for the setting to take full effect.
Why can't I use my financial tracker to consolidate my financial information?
In the current digital environment, multi-factor authentication (MFA) has become a necessary and common practice among financial institutions who support online account access.
- Read More
In the current digital environment, multi-factor authentication (MFA) has become a necessary and common practice among financial institutions who support online account access. In accordance with best practices, Security Benefit has also implemented MFA to maintain a high-level of online safety for your accounts. Because of the heightened security, MFA prevents financial data trackers from accessing your account. We suggest you contact your financial tracker software company to inquire how they recommend gathering account data from financial institutions who support MFA.
What is multi-factor authentication?
Security Benefit requires multi-factor authentication (MFA) to help protect your online account by requiring a verification code entered by you before accessing your account from an unknown device. You are in charge of deciding how to receive your verification code whether it be by text mess
- Read More
Security Benefit requires multi-factor authentication (MFA) to help protect your online account by requiring a verification code entered by you before accessing your account from an unknown device. You are in charge of deciding how to receive your verification code whether it be by text message, email or voice call. Once you receive your verification code, enter it when asked to gain access to your account.
Security Benefit requires MFA to help protect your online account by:
- Establishing a password.
- Establishing a verification method (how you’d like to verify your sign on: text, email or call back). We recommend setting up more than one method.
When you sign in to SecurityBenefit.com with your username and password, you will then be asked to have a verification code sent by text, email or call back depending on the options you selected during your account set up.
- Establishing a password.
Which browsers does SecurityBenefit.com support?
SecurityBenefit.com supports the current version and previous versions of the following browsers.
- Read More
SecurityBenefit.com supports the current version and previous versions of the following browsers.
- Chrome (We recommend using the Chrome web browser.)
- Safari
- Edge
- Firefox
Which mobile devices does SecurityBenefit.com support?
SecurityBenefit.com supports the current version and previous versions of iPhone and Android devices.
- Read More
SecurityBenefit.com supports the current version and previous versions of iPhone and Android devices.
I'm an employer. How do I register for an online account on SecurityBenefit.com?
If you’re a plan sponsor, you will manage your plan with us at our dedicated website for sponsors.
- Read More
If you’re a plan sponsor, you will manage your plan with us at our dedicated website for sponsors.
If you have any questions or need assistance with your current plan, please contact us at 800.747.3942.
I'm an individual. How do I register for an online account on SecurityBenefit.com?
Navigate to SecurityBenefit.com and click Register within the upper menu.
- Read More
Navigate to SecurityBenefit.com and click Register within the upper menu.
On the next screen, select which type of website user you are to begin the registration process.

Once your role has been chosen, you’ll be asked to fill in all required fields.
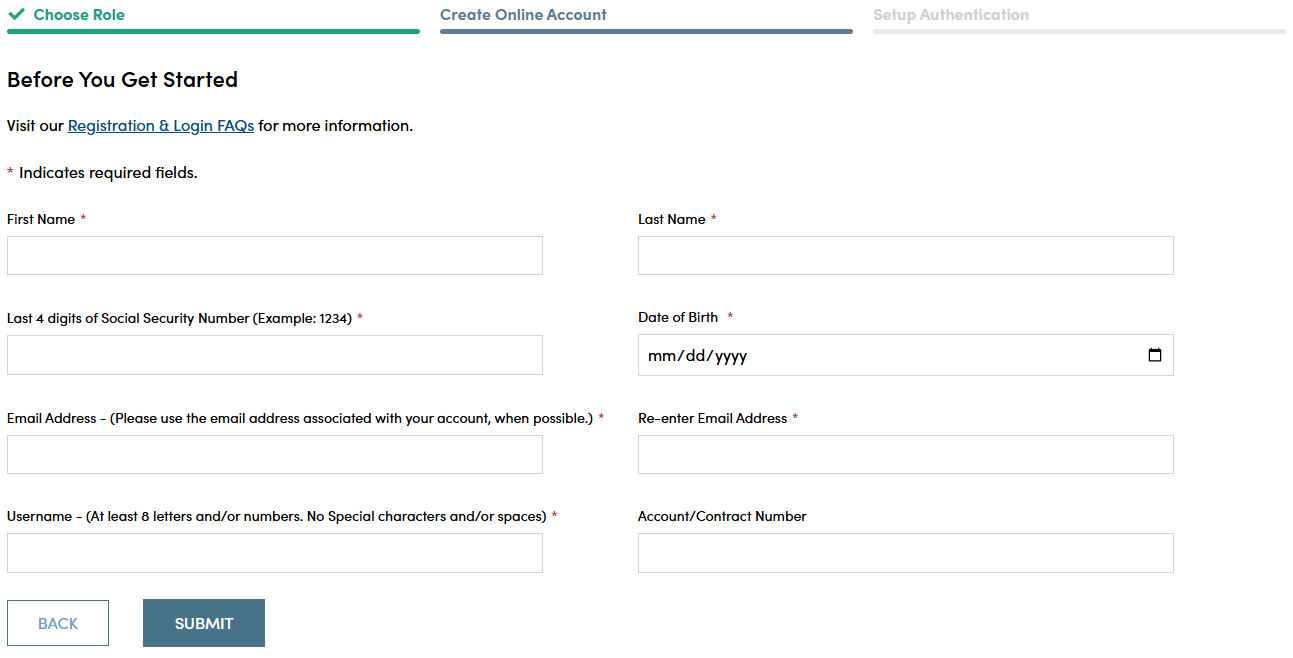
When you have successfully entered information into all required fields, the registration process is almost complete and you should see this screen. If you need to, you can navigate away from this page.

Check your email account used in the initial registration process for a confirmation email (the email will come from [email protected]). When it arrives, you will have 7 days to open it and click the link to finalize the account registration process, which includes:
- Setting up a password,
- Setting up security questions, and
- Entering a cell phone and/or landline phone number for multi-factor authentication.

Once you click "Complete my Registration", you will be asked to create a password. Passwords must contain:
- At least 12 characters
- At least 1 number
- At least 1 lowercase letter
- At least 1 uppercase letter
- At least 1 special character
- Does not contain part of the username
You will also be asked to choose a recovery question in the event of needing to reset a password or gain access when you have forgotten a password.

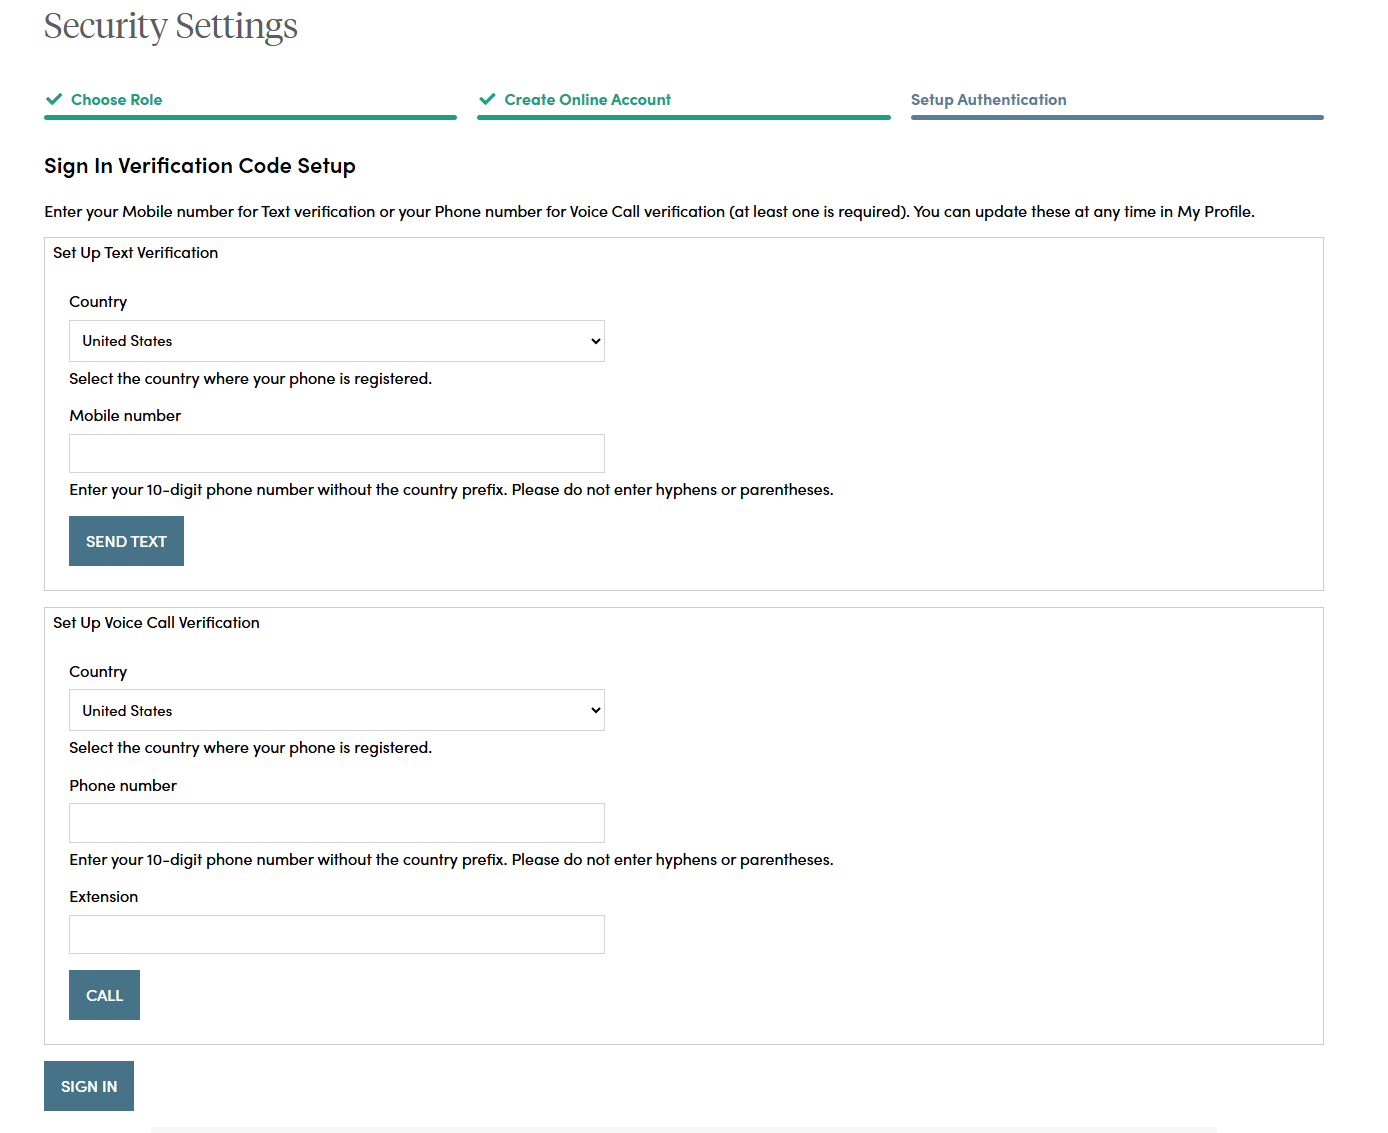
After successfully establishing a password and setting a recovery question, you will need to set up additional security verification numbers, either a text message or a voice call with verification code to any number you choose.
For text verification, enter your 10-digit cell phone number without the country prefix. Please do not enter hyphens or parentheses. Click on the “Send Text” button to verify the device. Please allow up to 30 seconds to receive the text.
To set up voice call verification, enter your 10-digit phone number without the country prefix. Please do not enter hyphens or parentheses. Click on the “Call” button to verify the phone number. Please allow a few minutes to receive your voice call.
If you selected text verification, this screen will appear and you can enter the verification code sent via SMS to your cell phone. Enter the code and click on the “Verify” button. Once verified, your cell phone number will allow you to receive a verification code to access the site if you are signing in from a new device, or signing in one year or more after your last sign in.
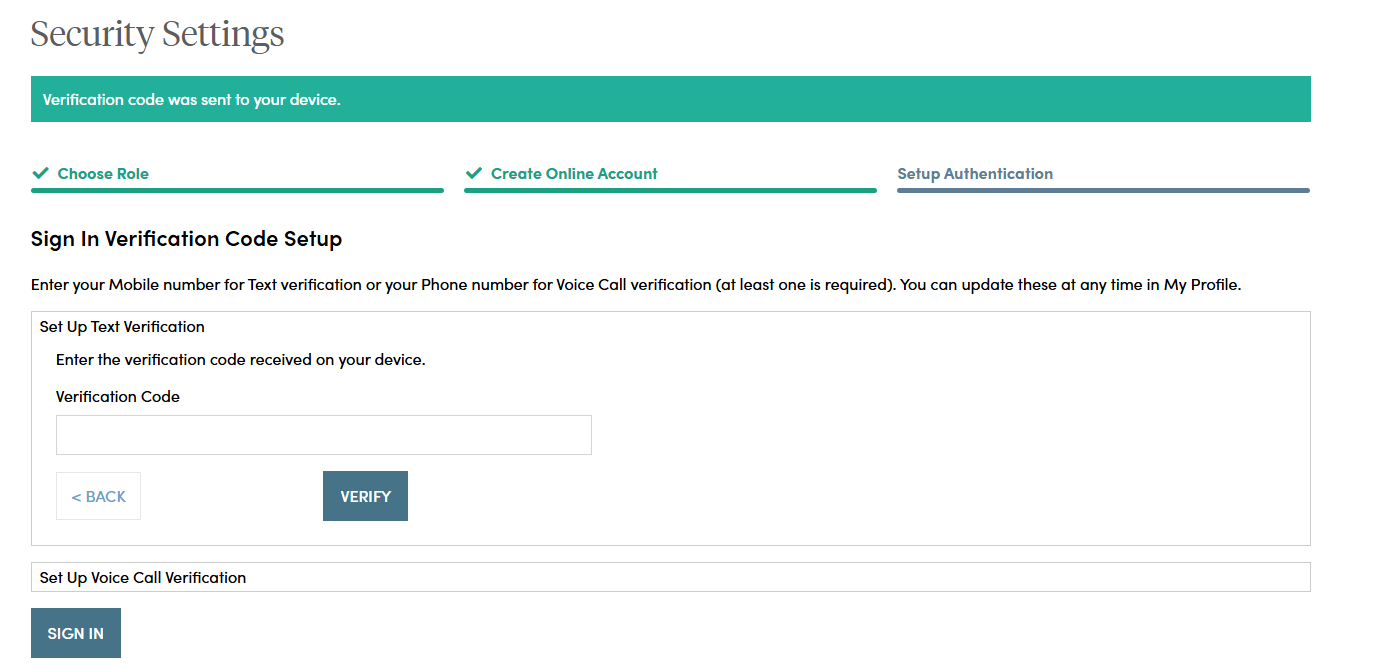
If you selected voice call verification, this screen will appear and you can enter the verification code received via a voice call to the number you entered. Enter the code and click on the “Verify” button. Once verified, your phone number will allow you to receive a verification code via voice call to access the site if you are signing in from a new device, or signing in one year or more after your last sign in.

When you have entered the verification code, this screen will appear which confirms the number that has been established for your profile. Should you wish to change a phone number, simply sign in to your account, navigate to My Profile in the upper right navigation and edit your profile information.
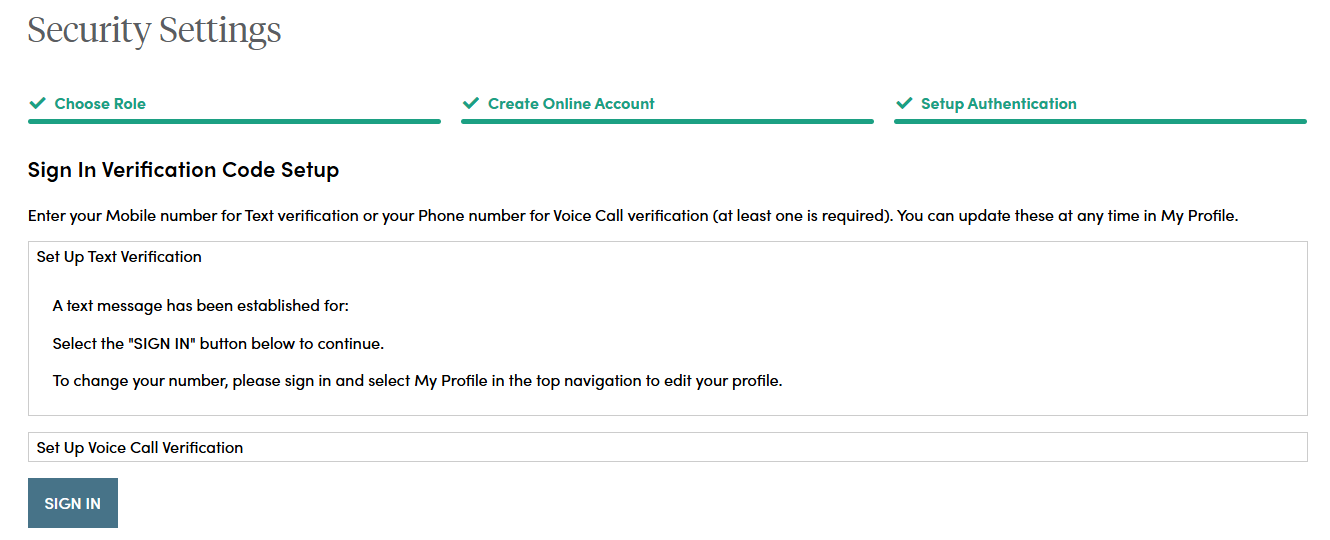
Your account set up is now complete. By clicking the "Sign In" button you can enter your credentials and access the website.
If you should have any questions or encounter any issues in registering, please call our Service Center at 800.888.2461 from 8 a.m. to 7 p.m. (Eastern Time), Monday through Friday.